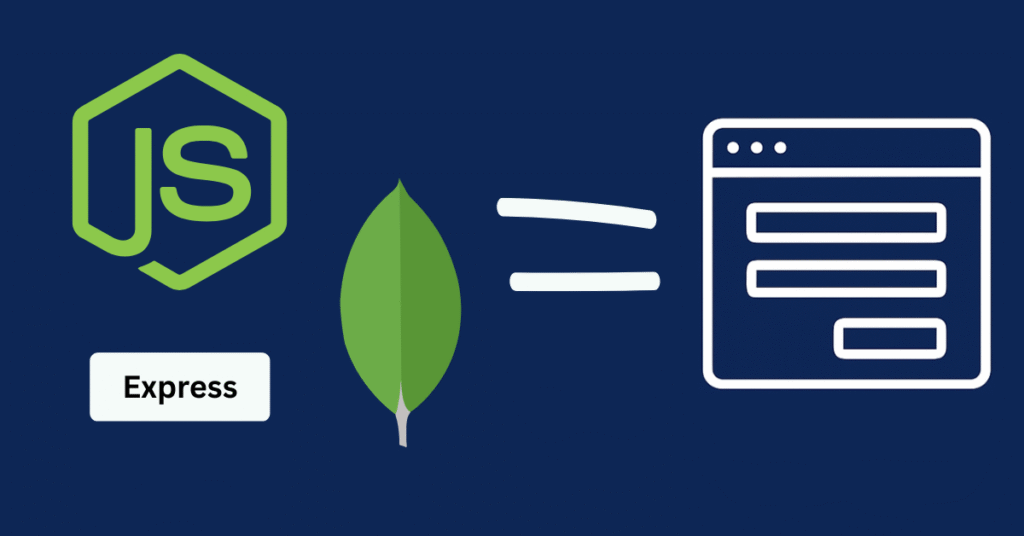
In this article, we are making a full-fledged CRUD application with the help of Node.js, MongoDB, and Express.js, and we will test our APIs using the REST Client Visual Studio Code extension (optional you can also use Postman or any other API testing tool).
This guide will help you build a simple CRUD application in Node.js, allowing you to understand the complete flow of a nodejs CRUD operation, especially useful for nodejs API development.
Here, I will share knowledge about Node.js , why Node.js matters, why we use MongoDB or any NoSQL database, and what Express.js actually is. Many people mix up Express.js with Node.js, even though Node.js is a runtime environment and Express.js is a backend framework built on top of Node.js.
Before jumping directly into the CRUD application, we need to understand the prerequisites. I won’t go into extremely deep details, but you will get enough clarity to understand every aspect of this CRUD application using Node.js MongoDB.
What is Node.js?
In the early days, developers used JavaScript only as a client-side language to create interactive web pages. Later, with the help of the V8 engine, JavaScript was developed to run on the server side as well.
To run JavaScript on the server, we need an environment that runtime environment is called Node.js.
So Node.js is nothing but an environment where we can use JavaScript as a backend or scripting language.
Why do we need Node.js?
We need Node.js to build backend applications, write business logic in our APIs, connect with databases, process data, and handle real-time features. It is event-driven, non-blocking I/O, supports WebSockets, and is built on the Chrome V8 engine, which provides high performance, especially for I/O-bound tasks.
Node Package Manager (NPM) also provides access to various libraries, toolkits, and packages to make development smoother.
What is Express.js?
Express.js is a backend framework an additional layer on top of Node.js that makes development easier. It provides useful classes and objects for APIs, routing, middleware, and error handling. Later in this article, you will also understand the code differences between Node.js and Express.js as we build our complete CRUD application with Node Express and MongoDB.
MongoDB
MongoDB is a NoSQL, document-based database.
It provides a flexible schema, meaning you don’t need to pre-define attributes; you can add multiple attributes to any document anytime.
Although MongoDB is not strongly consistent (as it doesn’t fully support ACID properties), we can tune it to achieve eventual consistency.
Also, MongoDB scales horizontally, helping handle large database operations efficiently.
Later in this article, we will use MongoDB Atlas, where I will explain documents, collections, and how to connect your Node.js application to the cloud database.
Let’s start with a basic Node.js script
First, we will create a simple HTTP server using only Node.js without Express.js. After this, we will begin our Node.js CRUD with MongoDB implementation so that you can understand the difference between Node.js alone and Express.js.
Here we will create an application to add, delete, update, and read stock (share) details – a perfect example of what is CRUD application.
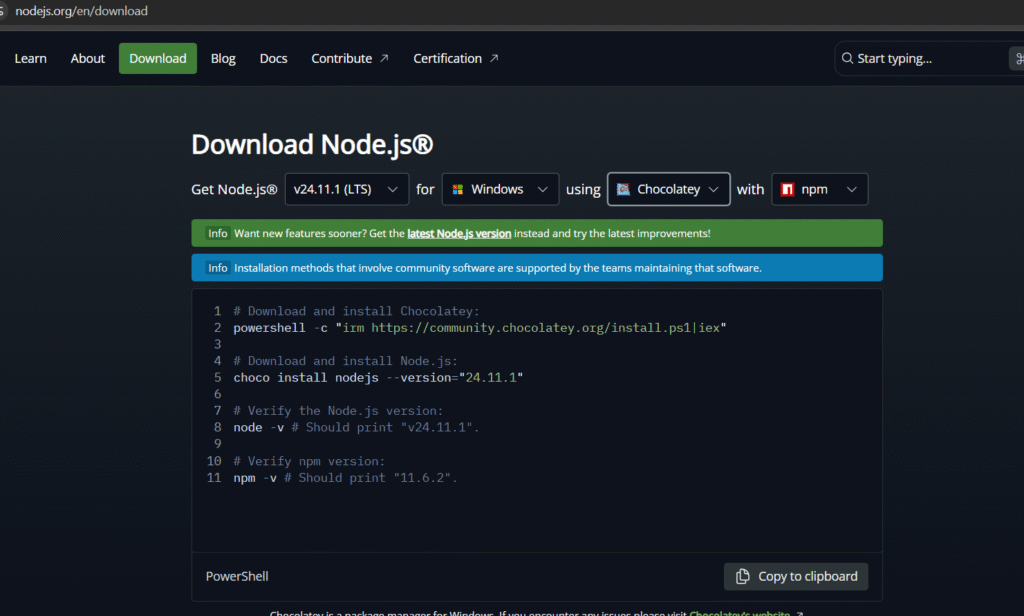
Download Node.js
(node js download link):
https://nodejs.org/en/download
Use these options and follow the commands:
Create a file named main.js and write this code:
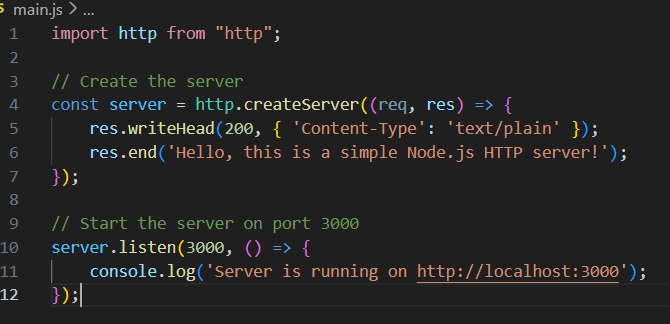
To run the server, use the command:
node main.js
Open http://localhost:3000 on your browser – you will see:
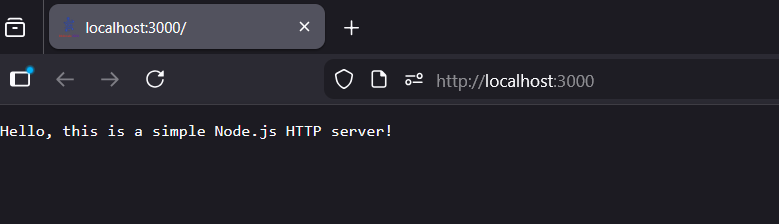
This is how you create a basic Node.js server. While we can add APIs, middleware, and error handlers using the http module, we will use Express.js for our CRUD application because Express simplifies routing and backend logic, making express js CRUD operations easier.
Let’s Start the CRUD Application
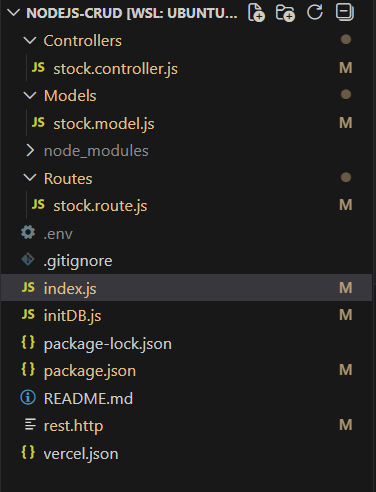
Let’s see the file system first:
Initialize your Node.js environment:
npm initThis command creates package.json and node_modules.
Install required packages:
npm install cors dotenv express http-errors mongoosepackage.json
This file contains metadata such as the project name, dependencies, and scripts to start or build the server.
node_modules
This folder contains all packages installed from NPM that we will use in our application.
index.js
This is the entry point of our application. Here we:
- Import necessary packages
- Configure environment variables
- Initialize the database
- Initialize Express
- Configure CORS
- Add middleware to parse the request body
- Register stock routes
- Add error handling middleware
- Start the server on the port defined in
.env

.env
PORT=3000
MONGODB_URI=<your mongo url> ( we will get this in below sections)
initDB.js

Finding the MongoDB URI
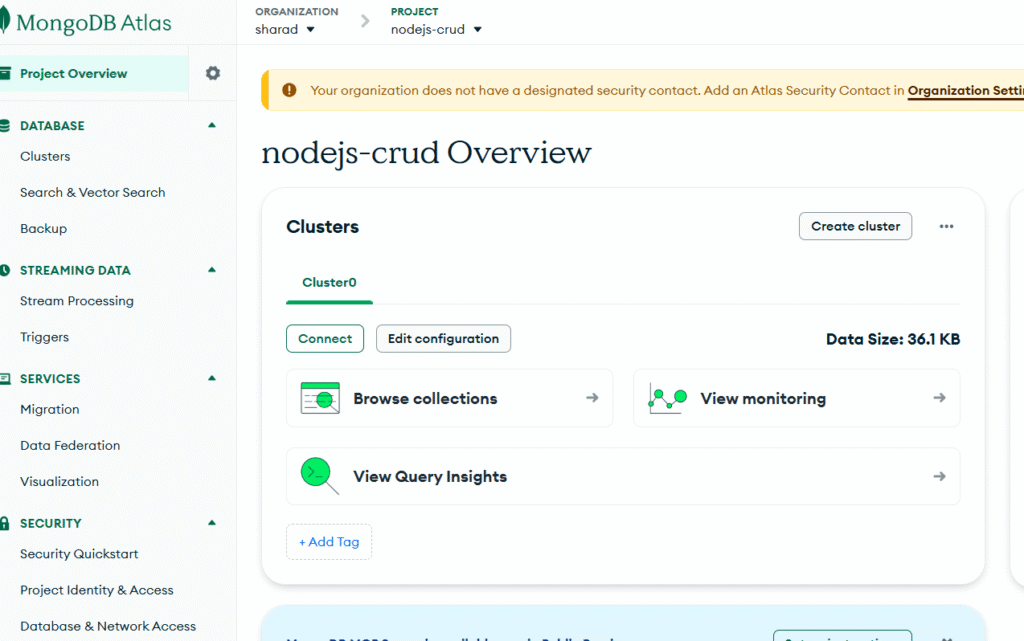
We will use MongoDB Atlas instead of a local MongoDB installation.
Login on : https://www.mongodb.com/
Create a free cluster and follow the steps:
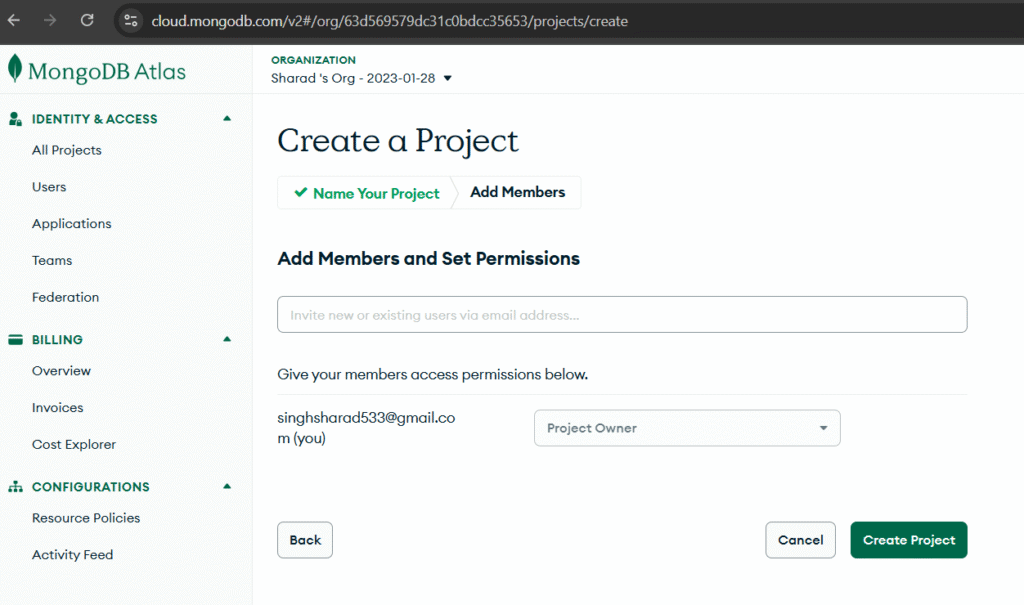
Create a New Project

Fill the details and click on next
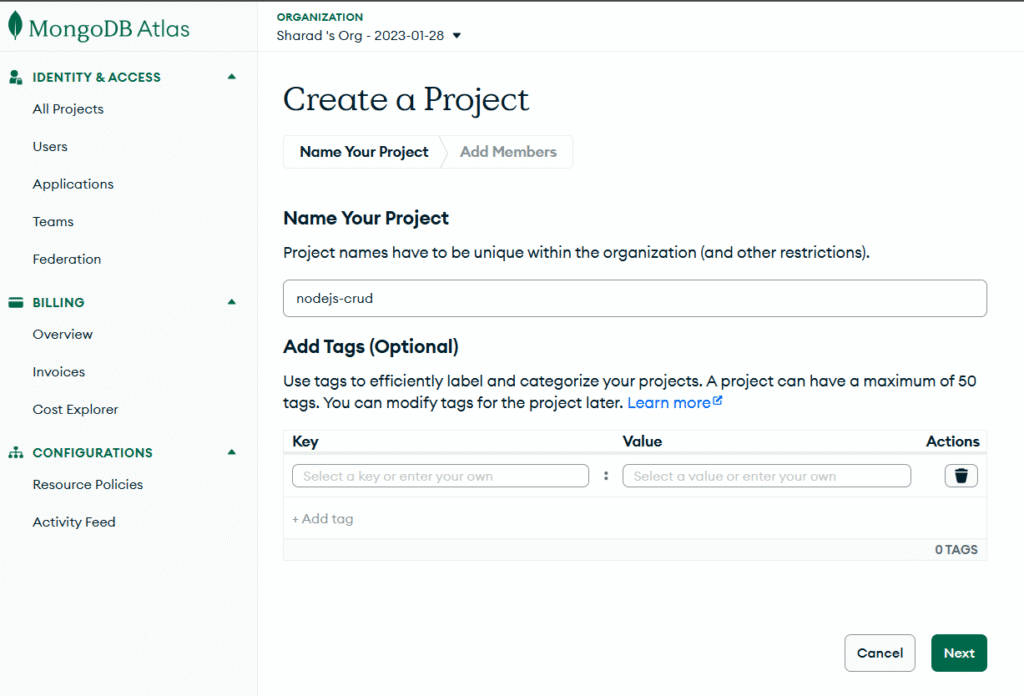
Add members in this project (optional)
You will get this dashboard
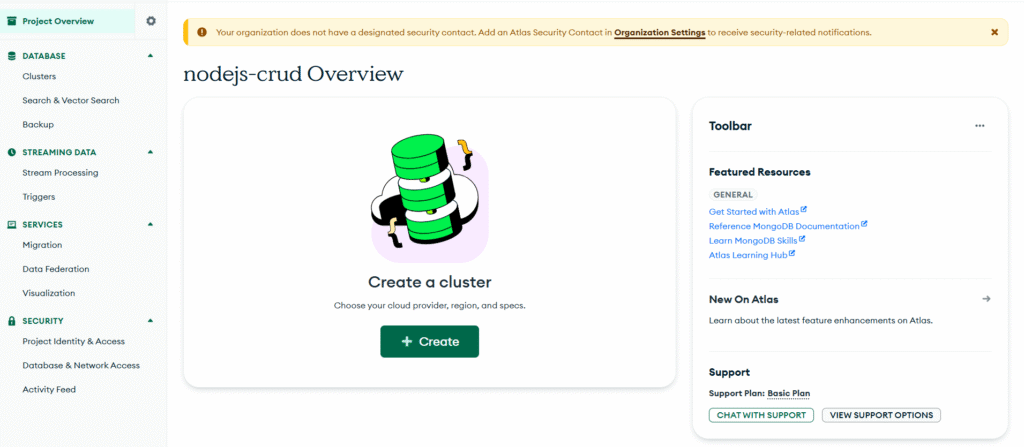
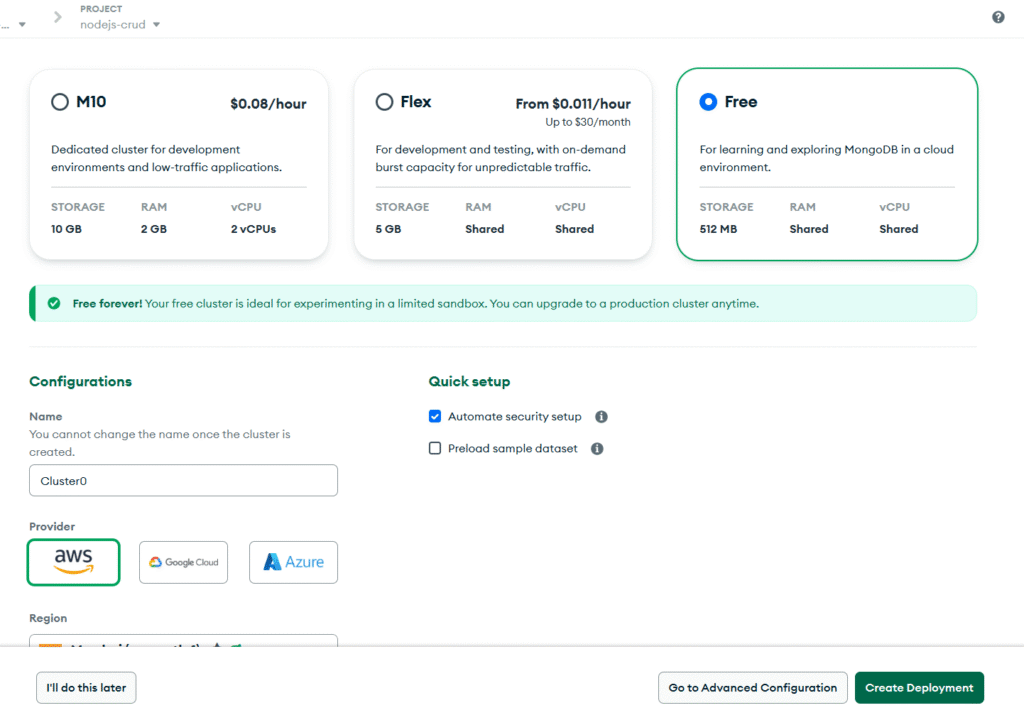
Let’s create cluster
Choose free tier and and cluster configuration and click on create deployment
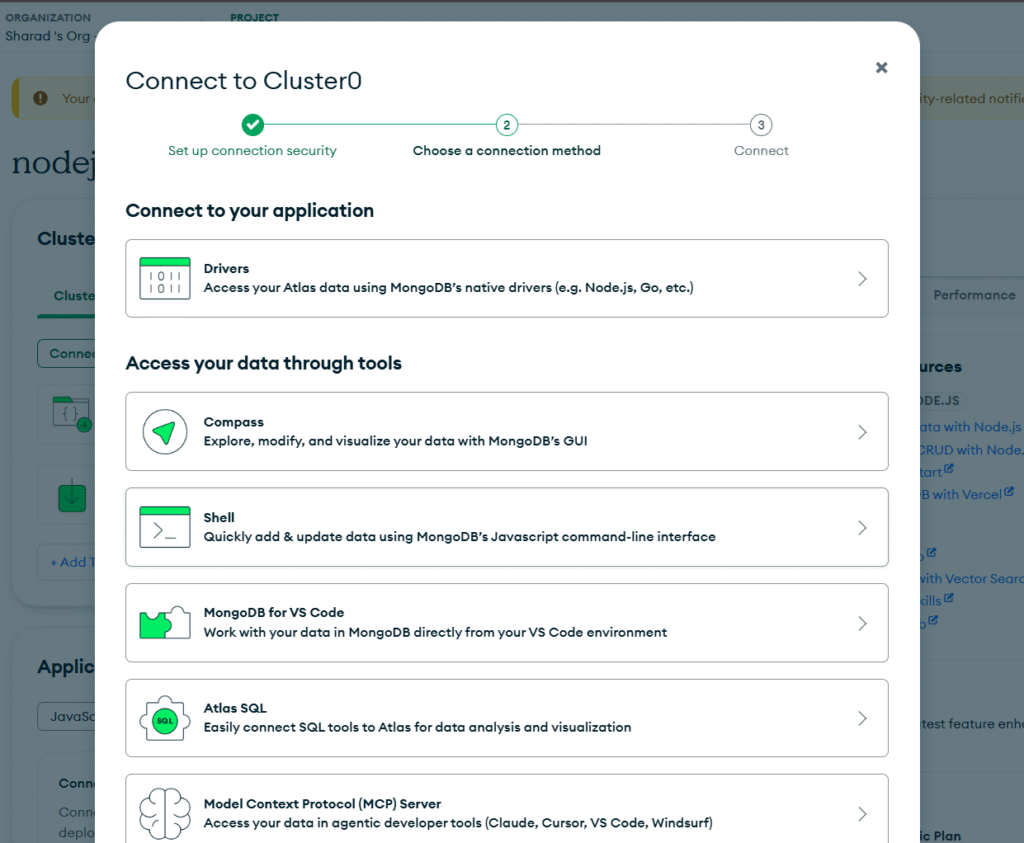
Click on Connect → Drivers and copy your MongoDB URL:
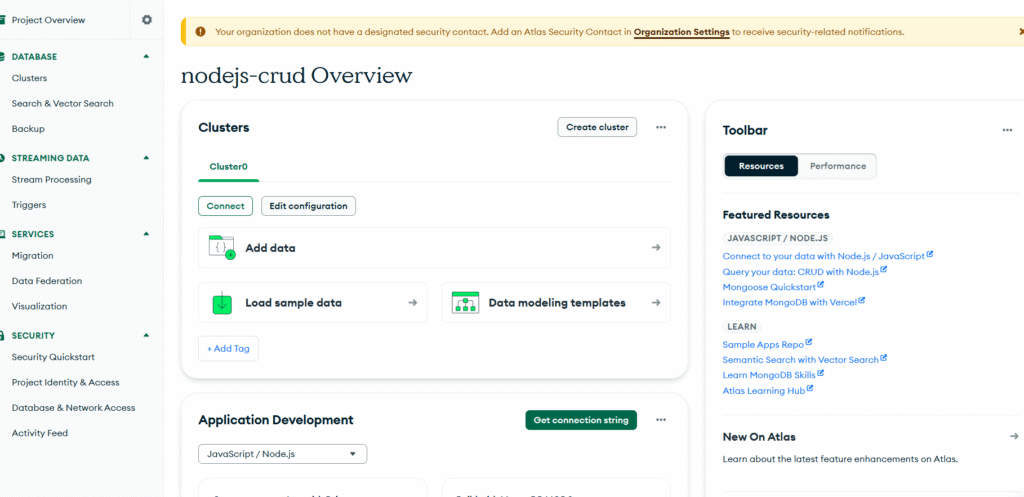
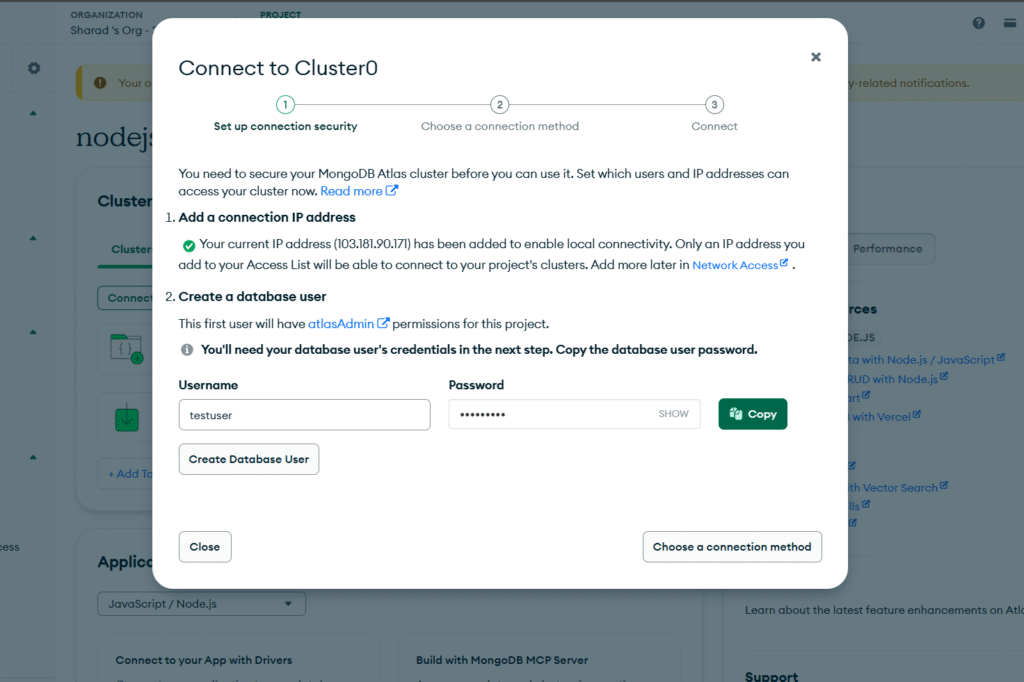
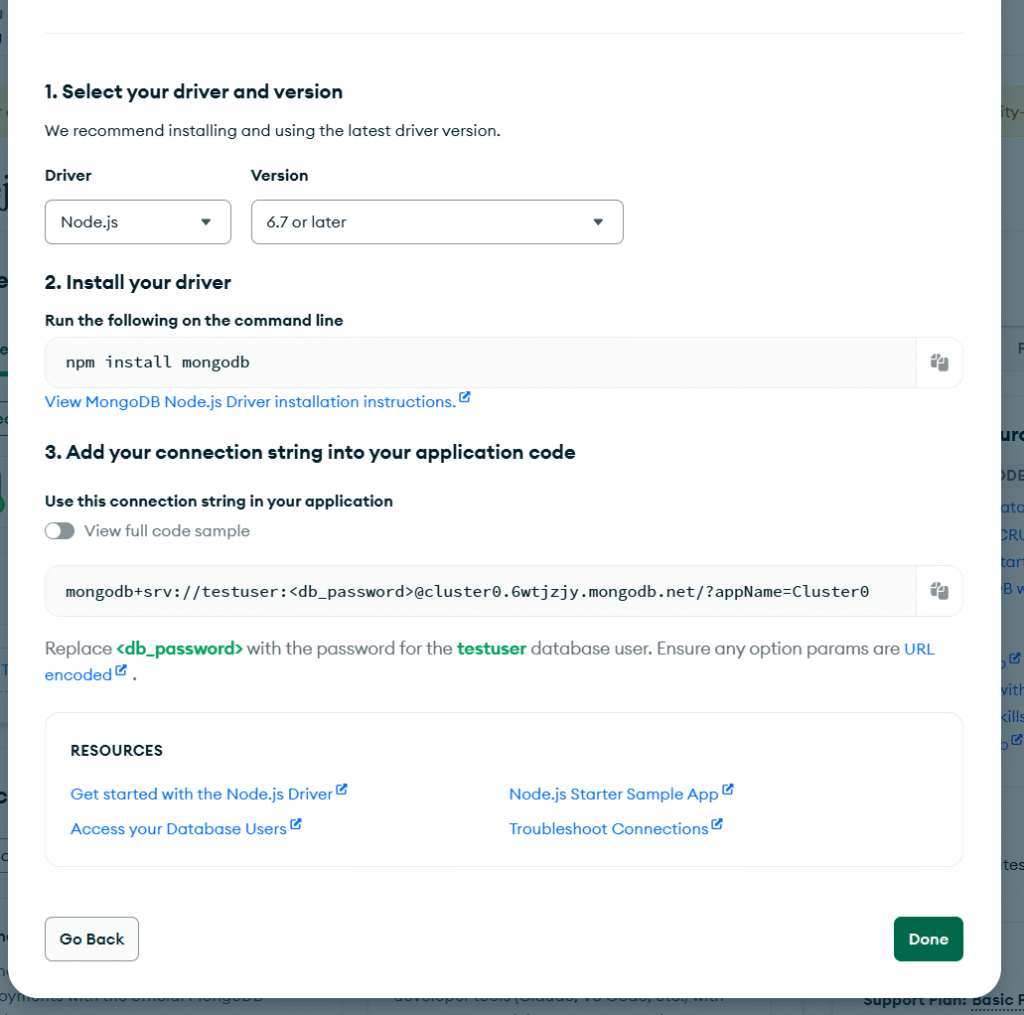
Example:
mongodb+srv://testuser:<db_password>@cluster0.6wtjzjy.mongodb.net/?appName=Cluster0Update your .env file:
PORT=3000
MONGODB_URI=mongodb+srv://testuser:<db_password>@cluster0.6wtjzjy.mongodb.net/?appName=Cluster0
MongoDB setup is complete.
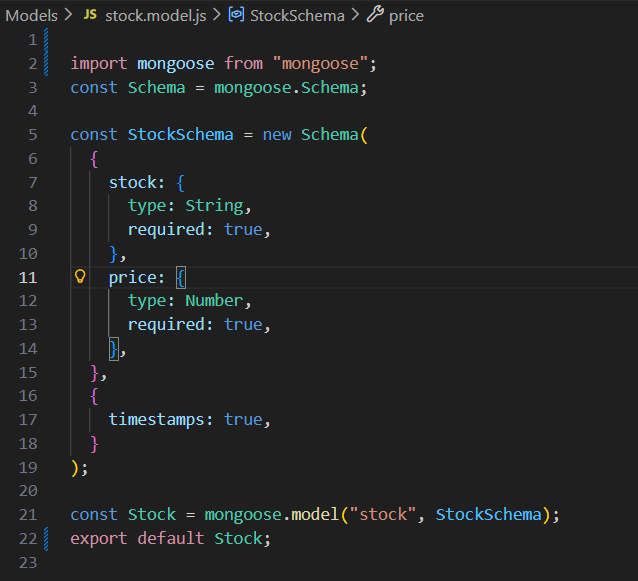
Models Directory
Create a folder named Models and add a file stock.model.js.
This file defines our database schema using Mongoose (ODM – Object Data Modeling).
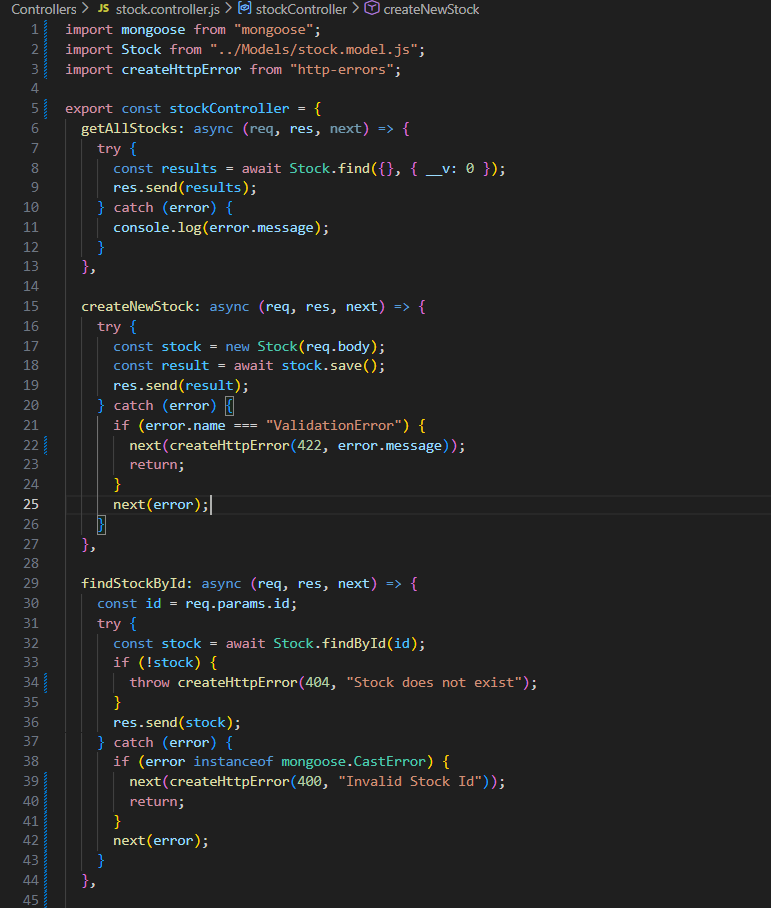
Controllers Directory
Create a folder named Controllers and add a file stock.controller.js.
This file contains all the business logic : fetch stocks, create stock, update stock, delete stock, etc.


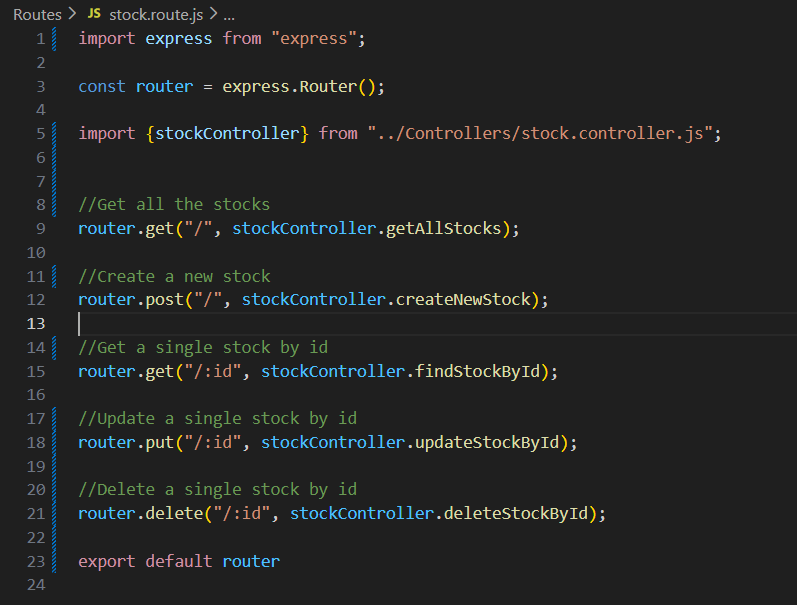
Routes Directory
Create a folder named Route and add a file stock.route.js.
This file defines API endpoints and maps them to controller functions.
.gitignore
This file contains directories and files that should not be pushed to GitHub.
# Compiled binary addons (https://nodejs.org/api/addons.html)
build/Release

# Dependency directories
node_modules/
jspm_packages/

# Snowpack dependency directory (https://snowpack.dev/)
web_modules/

# TypeScript cache
*.tsbuildinfo

# Optional npm cache directory
.npm

# Optional REPL history
.node_repl_history

# Output of 'npm pack'
*.tgz

# Yarn Integrity file
.yarn-integrity

# dotenv environment variables file
.env
.env.test
.env.production


# parcel-bundler cache (https://parceljs.org/)
.cache
.parcel-cache

# Next.js build output
.next
out

# Nuxt.js build / generate output
.nuxt
dist

# Gatsby files
.cache/
# Comment in the public line in if your project uses Gatsby and not Next.js
# https://nextjs.org/blog/next-9-1#public-directory-support
# public

# vuepress build output
.vuepress/dist

# Serverless directories
.serverless/

# FuseBox cache
.fusebox/

# DynamoDB Local files
.dynamodb/

# TernJS port file
.tern-port

# Stores VSCode versions used for testing VSCode extensions
.vscode-test

# yarn v2
.yarn/cache
.yarn/unplugged
.yarn/build-state.yml
.yarn/install-state.gz
.pnp.*

# End of https://mrkandreev.name/snippets/gitignore-generator/#Node
Start the Application
npm start
Testing APIs with REST Client in Visual Studio Code
Install the REST Client extension:
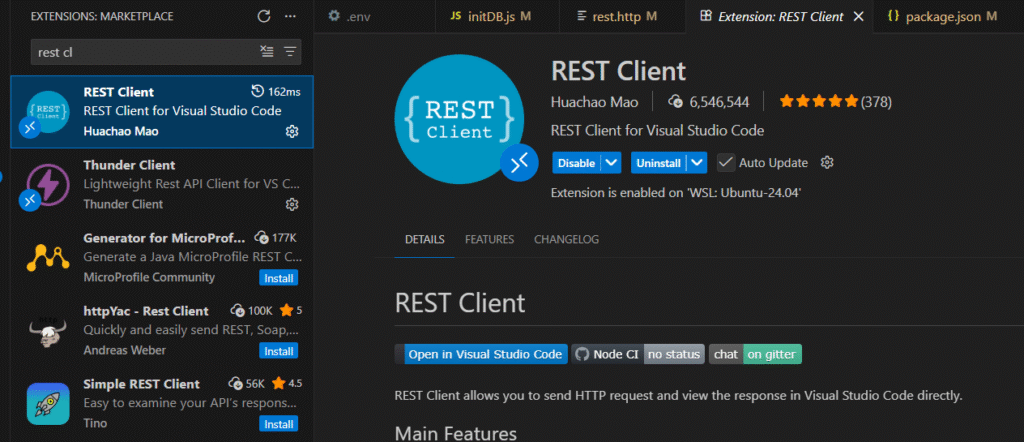
Create a file named rest.http:
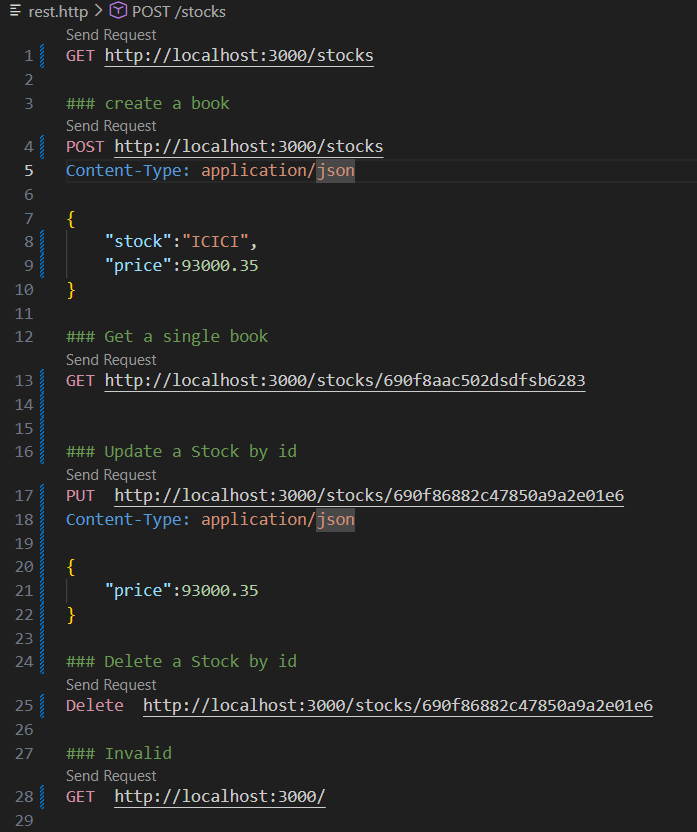
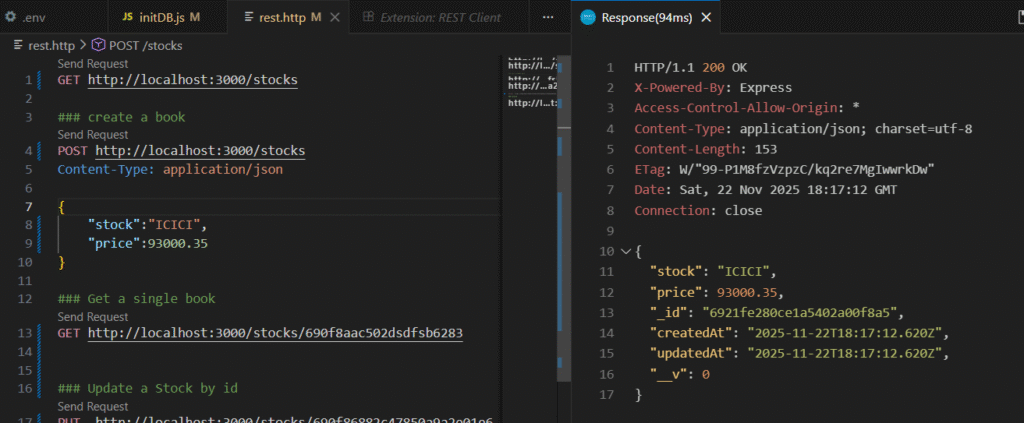
Click Send Request on each API.
Example:
GET http://localhost:3000/stocks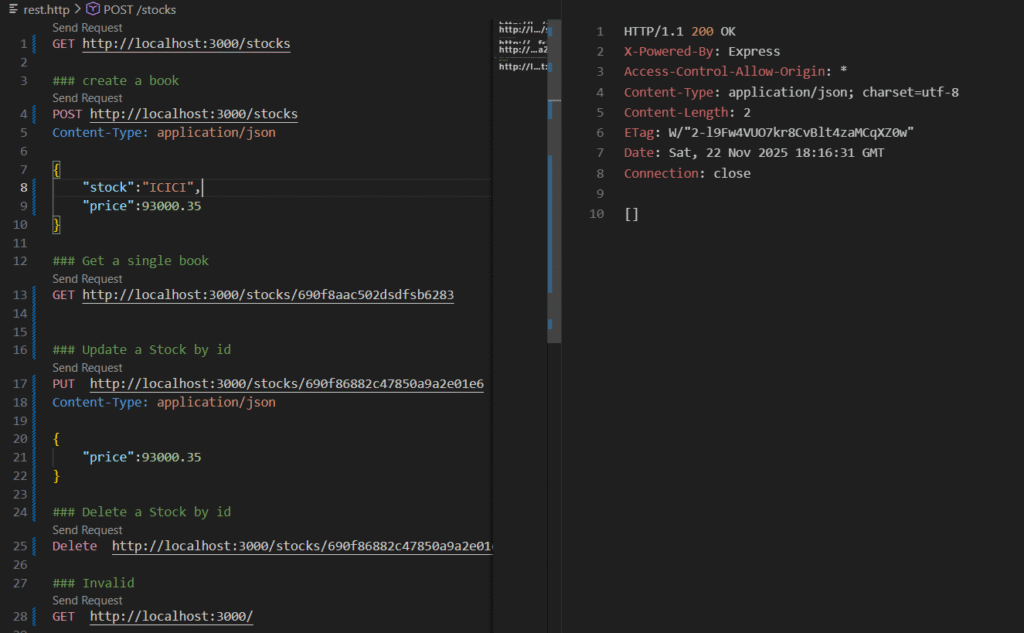
Create Stock
POST http://localhost:3000/stocks
Content-Type: application/json
{
    "stock": "ICICI",
    "price": 93000.35
}
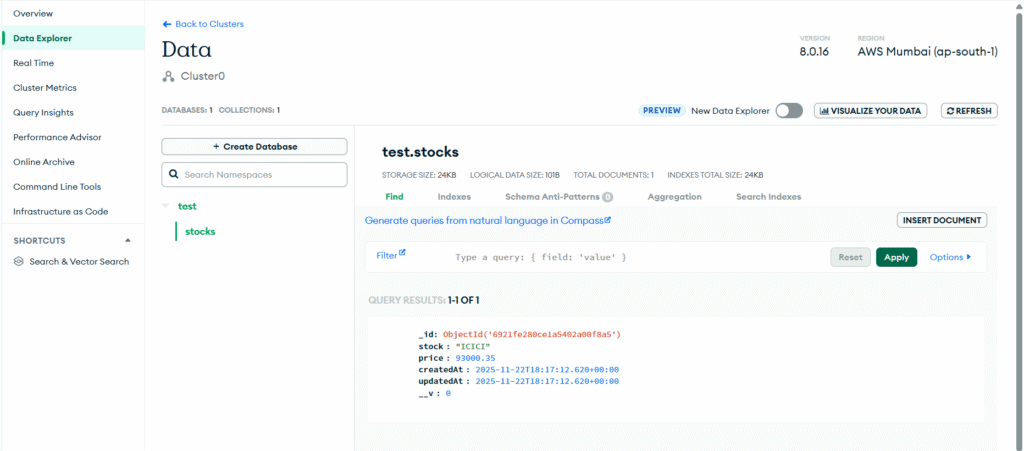
Check MongoDB Atlas under Browse Collections:
You can test all other APIs mentioned in the rest.http file.
Congratulations!
You have learned:
- Node.js basics
- Express.js fundamentals
- MongoDB and schema creation
- How to build a CRUD application using Node.js MongoDB
- How to test APIs using Visual Studio Code REST Client
- How to build a complete CRUD application with Node Express and MongoDB
I intentionally added code images instead of code so that you write the code yourself. This will boost your confidence instead of using copy-paste.
Now you can enhance this nodejs CRUD with MongoDB project with more features.
Feel free to reach out if you need any assistance.
Thank you – Keep Coding!